Rove + Dwell Blog

Our homestead journey

Our homestead journey

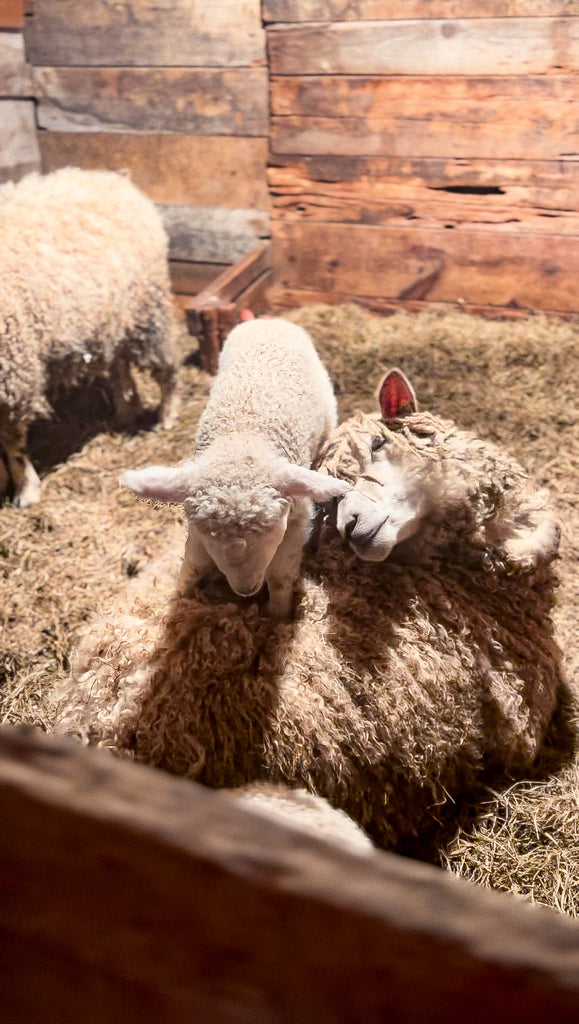
Embarking on a homesteading journey and restoring a historic property is not for the faint of heart. It requires a lot of hard work, dedication, and a willingness to take on new challenges. But for us, it is the fulfillment of a lifelong dream to live in harmony with nature, history, and each other.


Continue reading

5 Natural Paints to Make at Home

5 Natural Paints to Make at Home
Herb-infused paint: Add a few handfuls of dried herbs (such as lavender, rosemary, or thyme) to 1 cup of natural paint and let the mixture sit for a few days to infuse the paint with the herb's natural oils. You can use this paint to add a subtle fragrance to a room or to give your objects a natural, rustic look. Continue reading

A Lime Paint Recipe

A Lime Paint Recipe

For years I've wanted to try lime paint, and lime wash I discovered these mediums while researching historic and natural paint recipes when I created Old Barn Milk Paint. Lime wash is one of the oldest paints known to man dating back to ancient Egypt, and widely used to this day. Today I'm sharing a Lime Paint recipe that I created and love. Lime paint is not a precise formula, you can adjust the measurements as needed.


Lime Paint is well suited for porous surfaces, like brick, stone, cement, and gypsum and earth plasters. If your surface is previously painted, or is drywall Lime Paint will not mask unwanted variables in the surface (joint lines in drywall, patches, and filled holes) you'll want to prime your walls with a Lime Paint Primer, or apply a water-based drywall primer. I made my own Lime Paint Primer by adding casein to my initial coat of paint, but I do notice a little bit of ghosting in the final application of Lime Paint. Next time I will apply two coats of the primer. 

I mentioned lime wash above and wanted to touch on the difference in the two. Lime Paint is made with hydraulic lime and lime wash is made with lime putty and takes several coats to create your finish. Both paints are breathable, meaning they provide a vapor-permeable finish which allows buildings to breathe eliminating dampness, mold, and condensation, they are also inflammable, solvent and VOC free. These paints also have virtually no odor, they have an earthy kind of smell, but I would swear that when you paint a room it smells purified, it's hard to put into words, but the air feels cleaner to me.

I'm so happy to have a platform to share my love of natural paints and to feel secure enough to share these recipes I've created based of historic recipes I've spent years researching and storing for later testing. Lime Paint is now one of my favorite coatings for walls. Much like a Milk Painted finish, Lime Paint has life to it, there's beautiful movement in the pigments, you can create texture and "patterns" simply by the way you apply the paint. Drag Down, and Cloud are my favorite techniques to apply Lime Paint. I'll discuss application below in the recipe. As many of you saw on my social media Lime Painting is a very artistic finish. You have to just trust the process and keep going. It's easy to get discouraged in the beginning stages of application and as you see it drying it's a little scary, I admit. But the end result is stunning!  I felt like I was working on a masterpiece as I was painting and it was FUN! 

See our instagram reel on applying Lime Paint


Below is the recipe I developed for Lime Paint and used in our parlor, you can add natural clays, casein, animal fats, or boiled linseed oil to create your own recipe that works for you. I added Kaolin Clay because it added bulk to the paint (it's still a very thin paint, nothing like thick latex paint) You can omit the Kaolin Clay and use Lime, natural pigments, and water for a traditional lime paint recipe. I'm just sharing what worked for me when painting over drywall. 

Lime Paint

INGREDIENTS:

2 1/4 pounds High Calcium Hydrated Lime 

3 quarts water

1 pound Kaolin Clay

3 ounces lime-tolerant natural pigment (note: darker colors like black take more pigment up to 6oz)

* It's important to wear protective glasses and a mask when working with dried lime and Kaolin Clay. It's highly caustic in dry form, once mixed with water it is 100% non-toxic. 

MIXING: 

In a small container mix Natural Pigment with 1 1/2 cups lukewarm water

In a large 5 gallon bucket add Lime, Kaolin Clay, and slowly add remaining water

Mix with a paint and mud attachment for your drill, or use a large whisk. Stir continuously until the consistency is similar to light cream or whole milk. 

Add pigment and water mixture to Lime & Clay mixture. 

Mix until pigment is completely dispersed in the Lime & Clay

APPLICATION:

Using a large, long bristle masonry brush apply in thin, even strokes maintaining a wet edge. You should mist your wall with water for easier application. I also have a second smaller bucket with water that I will dip my brush in and really spread out the paint extending it as far as it will go. You don't want to over apply Lime Paint as it can become powdery when dry. The color becomes lighter as it dries, apply two to three coats waiting 24 hours between coats. This is an important step because the paint cures and bonds with the wall during this 24 hour time. When applying additional coats you'll want to mist your walls to ease application. 

There are several techniques to applying lime paint and lime wash. No two people will have the same results as one person may have a larger brush swing, heavier hand when applying. Trust the process and trust in your own technique. I'm sharing general application techniques it's not an exact science though, and its fun to experiment with your own! 

Drag Down: In all lime paint applications you want to start away from the edge and brush out the paint as far as it will extend avoiding a hard line. You can dip your brush in water shaking off excess water to really extend the paint dragging your brush down lightly to create subtle drag down lines. Do this with each coat. 

Cross Hatch: Starting away from the edge create a cross hatch pattern by lightly brushing in an X pattern you can do large swinging brush strokes always spreading out the lime paint and extending it as far as it will go. Offload your brush if needed in a new area fanning out in the cross hatch pattern and blending into the previous brush strokes.

Cloud: Starting away from the edge fan outwards in a cloud shape, don't worry about being precise, this is truly like abstract artwork, and the results wont truly show until the lime paint or lime wash is completely dry. Trust the process. Always start a new run of paint away from the last brushing into the last run so you do not have harsh lap marks. Enjoy this, it's supposed to be fun and creative. 

I had my moments during painting my first coat where I was really concerned. It took until the second coat dried for me to trust the process and my recipe. It's truly a form of self expression and I think it adds an elevated design level to any room. 

If anyone is interested I can package up a kit for mixing your own Lime Paint and add it to the website, otherwise there are several websites you can order lime, kaolin clay, and natural pigments from. One of my favorites is Earth Pigments the owner, Erin is so knowledgable and equally as passionate for natural paints, I absolutely adore her, and she's just across the lake from me in Vermont! 

Enjoy and if enough people are interested I will package up some Lime Paint Kits with everything you need.

xoxo Chrystal 


Continue reading

We are selling the Essex Cottage!

We are selling the Essex Cottage!
It's the biggest project of our lives to date, the barn needs restoration, the main house (the former tavern) needs work, the addition... well, it's what got me. 200 years it stood and each passing month it was getting further and further away from being saved. So we took another leap. All of us did, the owners, and our family. We came up with a plan, and we began work. Always in the middle of winter for us it seems!  Continue reading

Big Changes and new adventures!

Big Changes and new adventures!
With everything going on recently with the Pandemic and the reality of having to close our restaurant, I started looking pretty persistently. Around October I narrowed down this little area near the Vermont border as where I'd like to be. Grant you, this included New Hampshire and all of Vermont! I usually saw new houses come on the market right away, I had my search parameters saved and notifications on. Somehow, I missed this house. I was hoping for a property with a barn for the animals so I think that's why. When it did catch my eye, the description was fitting to what Toni and I were looking for, " Handyman Special-bring your renovation tools and make this your vacation home or investment property in the popular resort town." Well well, I love a good challenge and true historic renovation has always been my dream.  Continue reading

Old Barn Farm & Co.

Old Barn Farm & Co.


I don't really know how to introduce this, it was so unexpected and totally happened within a split second. We moved. Again. 

Though this move was unexpected, it has turned out to be a blessing. While battling a good bout of some serious depression this past fall up till recently, we found out we had to move. Knowing the housing crisis in our area after the Camp Fire I immediately started looking. We landed on this property in a way that truly shows me that there is someone out there guiding us.

Though moving right before Christmas was doubly as difficult as moving would be anyways with 6 kids, I saw the opportunity and gift given to us. There's a LOT of work to be done to get the land fire safe. Yes that's a huge concern here in Northern California. If you look up Helltown Ca you will see how heroically Helltown was saved by residents during the Camp Fire in 2018. 

 I spent the first 5 weeks on our land in a haze, going out only to connect with the earth and wondering what in the world I was going to do.  This canyon has experienced so much pain and loss in the last 14 months I felt that here.  I felt the heartbeat of the trees, the desire in the soil to give life once again. 


With much thought and research on the matter, and what I could do to give back. I decided that with all this land, and truthfully, the fire danger in the area we needed animals to help tend the land, goats and sheep eat the leaves and debris. All these Oak trees leave behind dry leaves and there are a lot of non native, invasive plants and grasses that don't survive our hot summers and turn into nice little fire starters and spreaders, they also cut off life to our native plants which also help abate fire. And that's how the farm started. I had... have choices to make. What animals would I love to raise? What animals can not only work the land, but produce some kind of income? What would coincide with Old Barn Living? Sheep produce fiber, goats produce goats milk. I can make fiber for the store, and make soaps, lotions, and more with the goats milk! 

I'm so big on our ancestry and heritage with my children's Icelandic roots that it was a no brainier that we'd definitely have to raise Icelandic Sheep. This sent me down the rabbit hole of Heritage breeds. The breeds that are best for fiber and my desire to join Fibershed. That led me to Jacob Sheep, the first sheep I purchased two gorgeous lilac boys, one 4 horn ram we named Hawthorn, and one sweet little wether Bea named Cocoa her fav winter drink. 

On this journey of finding the best heritage fiber sheep, I met Elizabeth, owner and head ringmaster of her own beautiful farm in Butte Valley, Milk & Honey 1860. Here I fell truly in love with the notion of raising sheep and children together. Elizabeth gracefully homeschools her 6 children, a venture I briefly tried and failed miserably at. Her children are smart, sweet and kind. Elizabeth patiently listened to my super green ideas. Ideas that I know will change as I learn more about raising sheep and goats.


Today I sit on land I'm cultivating, proudly own sheep, goats, a mini donkey, and soon a family milk cow! We have 27 of the sweetest chickens and love collecting their beautifully colored eggs each day, it's like little gifts of joy they leave for us! We hatched 13 little chicks in the incubator and the children learned how chickens hatch. This lifestyle is a change for us all, it's a change for better, we downsized our living situation massively, but we expanded our lives. We have LAND and livestock and so much life flowing from our fingertips it's beautiful. I am so happy with where this journey has taken us. I can't wait to incorporate our farm into more products for Old Barn Living, products that are made straight from the farm! 


Thank you all for your patience and understanding and most of all your support as you all saw something was up with me here. It's been a rough journey, but I feel like I can finally put down roots, finally call somewhere home.  

~Chrystal 

Continue reading

We're opening a restaurant!!

We're opening a restaurant!!
Gosh, reading all that, brings tears to my eyes. We were so busy I was never able to finish this blog post. We finished work on OBK and immediately opened, 7 weeks later Paradise burned to the ground  Continue reading

Our Master Bedroom - Organic mattress + living with plants!

Our Master Bedroom -  Organic mattress + living with plants!

 I'm not an interior designer and this space is just all about what I like. I'm SO happy with how my bedroom has become a peaceful space that exudes positive energy. Everywhere my eye lands is something I adore and treasure, something that gives a little jolt to my spirit. 

Continue reading

Creating Bespoke Colors

Creating Bespoke Colors
  Creating bespoke colors is just as easy as mixing up your milk paint! I'm a firm believer in zero waste and saving even the tiniest bit of milk paint powder pays off in the end to create beautiful new shades! Before we get started let's take a look at the minimal supplies you'll need! 
Continue reading

How to mix milk paint

How to mix milk paint


     Hey friends! I thought I'd take a minute today to chat about mixing milk paint! It is so incredibly simple and easy! 

 Looking back on my first experience mixing milk paint, I was so focused on not messing up I took all the fun out of it! Like many first timers, I wasn't even sure what consistency it was supposed to be and I got myself all stressed out over something that is just not that complicated at all! If you can mix up a glass of chocolate milk, this is really no different. Just imagine mixing chocolate milk with cream, this is the consistency I prefer for my milk paint and honestly guys I don't even measure anything anymore!


     We do have general directions to get you started; mix equal parts milk paint powder to water, this is a great recipe to get you started, but I have some tricks to help you on your way to becoming a milk paint dilettante! For starters, I always pour my mp powder in my mixing bowl first, then instead of dumping all of the suggested water in I pour just enough to cover the powder, (for those just starting out it may be helpful to imagine I'm using 1 cup of powder and have 1 cup of water) I then mix this up like a rue and slowly add water until I have a smooth, creamy mixture. Our mini whisks work wonders for this and create a super smooth consistency. We don't want lumps and clumps so always let your milk paint sit for about 10 minutes before using. 

     You probably know how impatient I am by now and are wondering seriously, Chrystal, you just sit there an watch the paint dissolve? Uh.. not so much, I use this time to prep my piece, because of my lack of patience I have figured out some great quick ways to prep furniture that don't take all day long. Some pieces you will need to spend adequate time on to get ready to accept the milk paint and look amazing when finished, for this post I'm just talking about those pieces that need a cleaning and possibly a quick sanding! I love to use simple green to clean my furniture because it cuts grease, tobacco smoke, and spills plus it dries quickly and I have a nice clean surface to paint on! 

     Ok, now that we have given all those clays and pigments time to dissolve give your mp a quick stir, it has probably thickened a bit as it's sat there and that's completely normal just add a splash of water, and for those of you who may have mixed it too thin before it may be just the right consistency now, Yay! Just a heads up, your first coat of milk paint may look pretty janky, you might think to yourself what is this?!! What did I do wrong, don't fret, this is totally normal. You second coat will provide much more coverage and you will fall in love I'm sure! 


    There are many applications you can use milk paint for, the above is for general painting. If you want to learn how to mix milk paint to a stain, wash, or fabric dye, keep reading! I am still awed by the many different uses for this one amazing paint! 

Mixing for stain: stains have to absorb into a porous surface, I mix no more than 3 parts water to 1 part milk paint powder. Let's say 2.5 cups of water over 1 cup of milk paint. Mix this up and allow the usual 10 minutes or so for everything to dissolve and check your consistency. This mixture should be a bit watery maybe like low fat milk. I don't know why all the dairy references when I'm talking about mixing and consistency, I don't cook, so I don't have many references there... we are all lucky I married a chef because I'm sure we'd all starve or survive off Door Dash!  I can pour a mean bowl of cereal and make some great chocolate milk though! 

With this stain mixture you can easily deepen the color by apply additional coats until you achieve the desired depth you are looking for. 


Mixing a wash: Washes are great for a subtle hint of color over a darker shade, over wood, and also for a glaze. To create a wash I generally mix 2 parts water to 1 part milk paint powder. This creates a thin mixture that you can easily apply and get transparent "washed" look. 

Mixing a DYE: If you haven't read about our Macrame + Milk Paint workshop we did at Anthropologie I'll link it here because this was one of the most fun ideas I've ever had and if you're reading this far you will probably enjoy it too! I played around with the idea of using milk paint for a dye after I painted my little black dresser. I used a wet distress technique on it and it completely dyed my cloth this gorgeous black color. The fabric had the same gorgeous velvety look that milk paint creates on furniture and I just knew I had to experiment. I figured out that about a cup of milk paint powder and about 4-5 cups of water would create a pretty decent dye. You can control the intensity of the color by adding more water and/or shortening the amount of time you let your fabric sit in the dye. I have not dyed large pieces of fabric in buckets and allowed them to sit so I don't have answers on how long to let the fabric sit in the dye. I have applied the dye with a paint brush and brushed it on applying additional coats to deepen the color if wanted. When we did the macrame workshop we dipped the ends in the dye and allowed it to soak for a short time and wrung out the excess liquid. When mixed properly this dye will not harden fabric and will maintain the texture of your original undyed material. 

I am so happy to have shared this information with you. If you have any questions please leave them below in the comments! 

Happy painting guys! 
~Chrystal


Continue reading
  • Previous
  • Page 1 of 2
  • Next
Back to top